Text To Speech and Speech To Text Example
Text to speech (TTS) and speech to text (STT) are two important features in modern android applications. TTS enables the application to read out the text to the user, while STT allows the user to speak and convert their speech into text. These features have numerous applications such as assistive technology for the visually impaired, language learning, and even in automotive navigation systems.
In this article, we will learn how to implement TTS and STT in android using Kotlin. We will start with TTS and then move to STT.
Text to Speech (TTS)
Step 1: Add the TTS library to the Gradle file
To use TTS in our android application, we need to add the TTS library to our Gradle file. We can do this by adding the following line to our Gradle file:
implementation 'com.google.android.tts:google-tts:1.1.1'
Step 2: Initialize the TTS engine
Next, we need to initialize the TTS engine. We can do this by creating an instance of the TextToSpeech class and passing a context and an onInitListener object.
lateinit var tts: TextToSpeech

tts = TextToSpeech(context, object : TextToSpeech.OnInitListener {
    override fun onInit(status: Int) {
        if (status == TextToSpeech.SUCCESS) {
            // TTS engine initialized successfully
        }
    }
})
Step 3: Specify the language and pitch
After initializing the TTS engine, we can specify the language and pitch of the TTS. We can do this by calling the setLanguage() and setPitch() methods on the TTS object.
tts.setLanguage(Locale.US)
tts.setPitch(1.0f)
Step 4: Speak the text
Finally, we can use the TTS engine to speak the text. We can do this by calling the speak() method on the TTS object and passing the text to be spoken.
val text = "Hello, world!"
tts.speak(text, TextToSpeech.QUEUE_FLUSH, null, null)
This will speak the text "Hello, world!" using the TTS engine.
Speech to Text (STT)
Step 1: Add the STT library to the Gradle file
To use STT in our android application, we need to add the STT library to our Gradle file. We can do this by adding the following line to our Gradle file:
implementation 'com.google.android.gms:play-services-speech:11.0.1'
Step 2: Check for permission
Before using STT, we need to check if the user has granted permission to use the microphone. We can do this by adding the following code to our activity:
private fun checkPermission() {
    if (ContextCompat.checkSelfPermission(this, Manifest.permission.RECORD_AUDIO) != PackageManager.PERMISSION_GRANTED) {
        ActivityCompat.requestPermissions(this, arrayOf(Manifest.permission.RECORD_AUDIO), 1)
    }
}
This will check if the permission to use the microphone has been granted, and if not, it will request the permission from the user.
Step 3: Start the STT intent
Next, we need to start the STT intent. We can do this by creating an intent and passing the RecognizerIntent.ACTION_RECOGNIZE_SPEECH action.
private fun startSTT() {
    val intent = Intent(RecognizerIntent.ACTION_RECOGNIZE_SPEECH)
    intent.putExtra(RecognizerIntent.EXTRA_LANGUAGE_MODEL, RecognizerIntent.LANGUAGE_MODEL_FREE_FORM)
    intent.putExtra(RecognizerIntent.EXTRA_LANGUAGE, Locale.getDefault())
    startActivityForResult(intent, 1)
}
This will start the STT intent and launch the speech recognition dialog.
Step 4: Process the STT result
Finally, we need to process the STT result. We can do this by overriding the onActivityResult() method and checking if the result is valid.
override fun onActivityResult(requestCode: Int, resultCode: Int, data: Intent?) {
    super.onActivityResult(requestCode, resultCode, data)
    if (requestCode == 1 && resultCode == RESULT_OK && data != null) {
        val result = data.getStringArrayListExtra(RecognizerIntent.EXTRA_RESULTS)
        if (result != null && result.isNotEmpty()) {
            val text = result[0]
            // Process the recognized text
        }
    }
}
This will process the STT result and extract the recognized text from the result array.
More Examples
This section will teach via simple examples Text To Speech and Speech To Text. How you can convert written text to spoken words or spoken words to written text programmatically.
There are two examples so far:
- Example 1 Kotlin Speech to Text and Text to Speech
- Example 2- Kotlin Speech to Text and Text to Speech
Let's get started.
Example 1: Kotlin Android Text to Speech and Text Speech
Let us look at our example. This example covers both Text To Speech and Speech To Text. There is an edittext where you type the text to be converted.
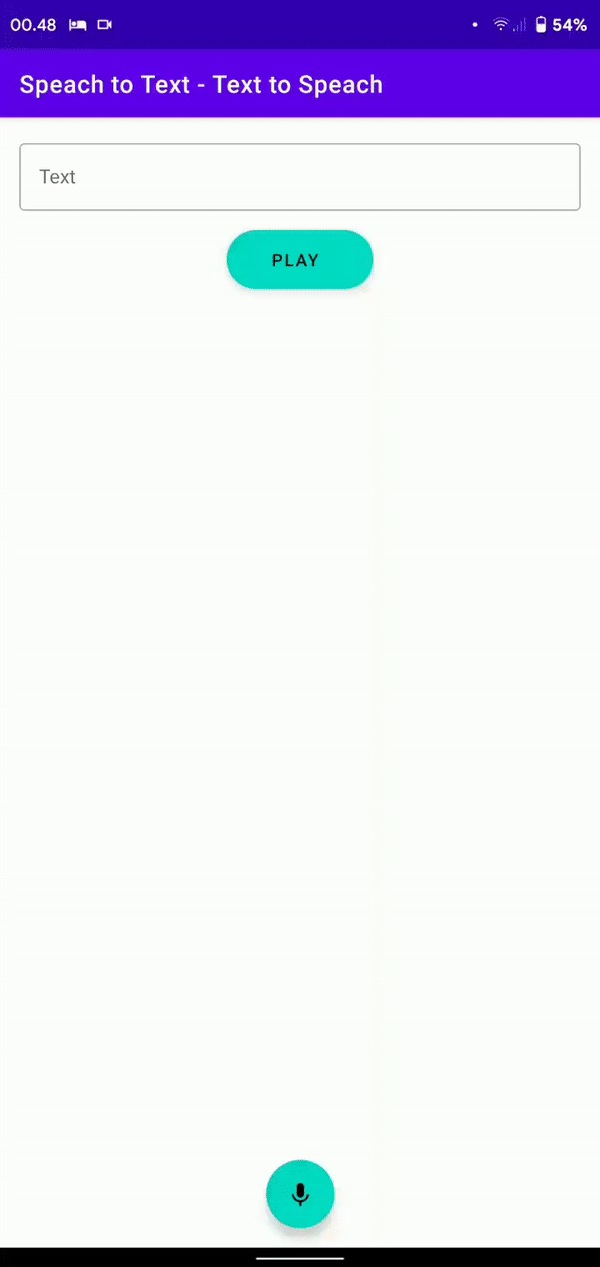
Here is a demo of what we will create:
Step 1: Create Project
Start by creating an empty Android Studio project.
Step 2: Dependencies
No third party library is needed.
Step 3: Design Layout
We have one layout: the layout for our MainActivity:
activity_main.xml
We will add TextInputEditText, a FloatingActionButton and an ExtendedFloatingAction as our UI components:
<?xml version="1.0" encoding="utf-8"?>
<androidx.constraintlayout.widget.ConstraintLayout xmlns:android="http://schemas.android.com/apk/res/android"
    xmlns:app="http://schemas.android.com/apk/res-auto"
    xmlns:tools="http://schemas.android.com/tools"
    android:layout_width="match_parent"
    android:layout_height="match_parent"
    tools:context=".MainActivity">

    <com.google.android.material.textfield.TextInputLayout
        android:id="@+id/textInputLayout"
        style="@style/Widget.MaterialComponents.TextInputLayout.OutlinedBox"
        android:layout_width="match_parent"
        android:layout_height="wrap_content"
        android:layout_marginStart="16dp"
        android:layout_marginTop="16dp"
        android:layout_marginEnd="16dp"
        app:layout_constraintEnd_toEndOf="parent"
        app:layout_constraintStart_toStartOf="parent"
        app:layout_constraintTop_toTopOf="parent">

        <com.google.android.material.textfield.TextInputEditText
            android:id="@+id/edtText"
            android:layout_width="match_parent"
            android:layout_height="wrap_content"
            android:hint="Text" />
    </com.google.android.material.textfield.TextInputLayout>

    <com.google.android.material.floatingactionbutton.ExtendedFloatingActionButton
        android:id="@+id/fabPlay"
        android:layout_width="wrap_content"
        android:layout_height="wrap_content"
        android:layout_marginTop="16dp"
        android:text="Play"
        android:textAlignment="center"
        app:layout_constraintEnd_toEndOf="parent"
        app:layout_constraintStart_toStartOf="parent"
        app:layout_constraintTop_toBottomOf="@+id/textInputLayout" />

    <com.google.android.material.floatingactionbutton.FloatingActionButton
        android:id="@+id/fabVoice"
        android:layout_width="wrap_content"
        android:layout_height="wrap_content"
        android:layout_marginBottom="16dp"
        android:clickable="true"
        app:layout_constraintBottom_toBottomOf="parent"
        app:layout_constraintEnd_toEndOf="parent"
        app:layout_constraintStart_toStartOf="parent"
        app:srcCompat="@drawable/ic_keyboard_voice" />

</androidx.constraintlayout.widget.ConstraintLayout>
Step 4: Create a ViewModel
We will have a class called BaseViewModel which will extend the androidx.lifecycle.ViewModel and be our ViewModel class. Here we will have atleast two functions:
A function to launch our speech recognizer via Intent:
    fun displaySpeechRecognizer() {
        startForResult.launch(Intent(RecognizerIntent.ACTION_RECOGNIZE_SPEECH).apply {
            putExtra(
                RecognizerIntent.EXTRA_LANGUAGE_MODEL,
                RecognizerIntent.LANGUAGE_MODEL_FREE_FORM
            )
            putExtra(RecognizerIntent.EXTRA_LANGUAGE, Locale("in_ID"))
            putExtra(RecognizerIntent.EXTRA_PROMPT, Locale("Bicara sekarang"))
        })
    }
And a function to turn our Text into Speech via the textToSpeechEngine:
    fun speak(text: String) = viewModelScope.launch{
        textToSpeechEngine.speak(text, TextToSpeech.QUEUE_FLUSH, null, "")
    }
Here is the full code:
BaseViewModel.kt
import android.content.Intent
import android.speech.RecognizerIntent
import android.speech.tts.TextToSpeech
import androidx.activity.result.ActivityResultLauncher
import androidx.lifecycle.ViewModel
import androidx.lifecycle.viewModelScope
import kotlinx.coroutines.launch
import java.util.*

class BaseViewModel : ViewModel() {

    private lateinit var textToSpeechEngine: TextToSpeech
    private lateinit var startForResult: ActivityResultLauncher<Intent>

    fun initial(
        engine: TextToSpeech, launcher: ActivityResultLauncher<Intent>
    ) = viewModelScope.launch {
        textToSpeechEngine = engine
        startForResult = launcher
    }

    fun displaySpeechRecognizer() {
        startForResult.launch(Intent(RecognizerIntent.ACTION_RECOGNIZE_SPEECH).apply {
            putExtra(
                RecognizerIntent.EXTRA_LANGUAGE_MODEL,
                RecognizerIntent.LANGUAGE_MODEL_FREE_FORM
            )
            putExtra(RecognizerIntent.EXTRA_LANGUAGE, Locale("in_ID"))
            putExtra(RecognizerIntent.EXTRA_PROMPT, Locale("Bicara sekarang"))
        })
    }

    fun speak(text: String) = viewModelScope.launch{
        textToSpeechEngine.speak(text, TextToSpeech.QUEUE_FLUSH, null, "")
    }

}
Step 5: Create our MainActivity
Finally we will have our MainActivity:
MainActivity.kt
import android.os.Bundle
import android.speech.RecognizerIntent
import android.speech.tts.TextToSpeech
import androidx.activity.result.contract.ActivityResultContracts
import androidx.activity.viewModels
import androidx.appcompat.app.AppCompatActivity
import id.derysudrajat.stttts.databinding.ActivityMainBinding
import java.util.*

class MainActivity : AppCompatActivity() {

    private lateinit var binding: ActivityMainBinding
    private val model: BaseViewModel by viewModels()

    override fun onCreate(savedInstanceState: Bundle?) {
        super.onCreate(savedInstanceState)
        binding = ActivityMainBinding.inflate(layoutInflater)
        setContentView(binding.root)
        model.initial(textToSpeechEngine, startForResult)
        with(binding) {
            fabVoice.setOnClickListener { model.displaySpeechRecognizer() }
            fabPlay.setOnClickListener {
                val text = edtText.text?.trim().toString()
                model.speak(if (text.isNotEmpty()) text else "Text tidak boleh kosong")
            }
        }
    }

    private val startForResult = registerForActivityResult(
        ActivityResultContracts.StartActivityForResult()
    ) { result ->
        if (result.resultCode == RESULT_OK) {
            val spokenText: String? =
                result.data?.getStringArrayListExtra(RecognizerIntent.EXTRA_RESULTS)
                    .let { text -> text?.get(0) }
            binding.edtText.setText(spokenText)
        }
    }

    private val textToSpeechEngine: TextToSpeech by lazy {
        TextToSpeech(this) {
            if (it == TextToSpeech.SUCCESS) textToSpeechEngine.language = Locale("in_ID")
        }
    }
}
Run
Copy the code or download it in the link below, build and run.
Reference
Here are the reference links:
| Number | Link |
|---|---|
| 1. | Download Example |
| 2. | Follow code author |
Example 2: Simple Text To Speech and Speech to Text Example
This is a simple Text To Speech and Speech To Text example in Kotlin Android.
Step 1: Create Project
Start by creating an empty Android Studio project.
Step 2: Dependencies
No third party library is needed.
Step 3: Design Layout
Add two buttons: one for TTS and the other STT, as well as an edittext for entering or displaying the text.
activity_main.xml
<?xml version="1.0" encoding="utf-8"?>
<LinearLayout xmlns:android="http://schemas.android.com/apk/res/android"
    xmlns:tools="http://schemas.android.com/tools"
    android:layout_width="match_parent"
    android:layout_height="match_parent"
    android:gravity="center"
    android:orientation="vertical"
    android:padding="24dp"
    tools:context=".MainActivity">

    <Button
        android:id="@+id/btn_stt"
        android:layout_width="wrap_content"
        android:layout_height="wrap_content"
        android:text="Speak" />

    <EditText
        android:id="@+id/et_text_input"
        android:layout_width="match_parent"
        android:layout_height="0dp"
        android:layout_marginTop="24dp"
        android:layout_marginBottom="24dp"
        android:layout_weight="1"
        android:gravity="center"
        android:hint="Text from STT or for TTS goes here." />

    <Button
        android:id="@+id/btn_tts"
        android:layout_width="wrap_content"
        android:layout_height="wrap_content"
        android:text="Listen" />

</LinearLayout>
Step 4: Write Code
Here is the full code:
MainActivity.kt
import android.app.Activity
import android.content.ActivityNotFoundException
import android.content.Intent
import android.os.Build
import android.os.Bundle
import android.speech.RecognizerIntent
import android.speech.tts.TextToSpeech
import android.widget.Toast
import androidx.appcompat.app.AppCompatActivity
import kotlinx.android.synthetic.main.activity_main.*
import java.util.*

class MainActivity : AppCompatActivity() {

    companion object {
        private const val REQUEST_CODE_STT = 1
    }

    private val textToSpeechEngine: TextToSpeech by lazy {
        TextToSpeech(this,
            TextToSpeech.OnInitListener { status ->
                if (status == TextToSpeech.SUCCESS) {
                    textToSpeechEngine.language = Locale.UK
                }
            })
    }

    override fun onCreate(savedInstanceState: Bundle?) {
        super.onCreate(savedInstanceState)
        setContentView(R.layout.activity_main)

        btn_stt.setOnClickListener {
            val sttIntent = Intent(RecognizerIntent.ACTION_RECOGNIZE_SPEECH)
            sttIntent.putExtra(
                RecognizerIntent.EXTRA_LANGUAGE_MODEL,
                RecognizerIntent.LANGUAGE_MODEL_FREE_FORM
            )
            sttIntent.putExtra(RecognizerIntent.EXTRA_LANGUAGE, Locale.getDefault())
            sttIntent.putExtra(RecognizerIntent.EXTRA_PROMPT, "Speak now!")

            try {
                startActivityForResult(sttIntent, REQUEST_CODE_STT)
            } catch (e: ActivityNotFoundException) {
                e.printStackTrace()
                Toast.makeText(this, "Your device does not support STT.", Toast.LENGTH_LONG).show()
            }
        }

        btn_tts.setOnClickListener {
            val text = et_text_input.text.toString().trim()
            if (text.isNotEmpty()) {
                if (Build.VERSION.SDK_INT >= Build.VERSION_CODES.LOLLIPOP) {
                    textToSpeechEngine.speak(text, TextToSpeech.QUEUE_FLUSH, null, "tts1")
                } else {
                    textToSpeechEngine.speak(text, TextToSpeech.QUEUE_FLUSH, null)
                }
            } else {
                Toast.makeText(this, "Text cannot be empty", Toast.LENGTH_LONG).show()
            }
        }

    }

    override fun onActivityResult(requestCode: Int, resultCode: Int, data: Intent?) {
        super.onActivityResult(requestCode, resultCode, data)
        when (requestCode) {
            REQUEST_CODE_STT -> {
                if (resultCode == Activity.RESULT_OK && data != null) {
                    val result = data.getStringArrayListExtra(RecognizerIntent.EXTRA_RESULTS)
                    result?.let {
                        val recognizedText = it[0]
                        et_text_input.setText(recognizedText)
                    }
                }
            }
        }
    }

    override fun onPause() {
        textToSpeechEngine.stop()
        super.onPause()
    }

    override fun onDestroy() {
        textToSpeechEngine.shutdown()
        super.onDestroy()
    }
}
Run
Copy the code or download it in the link below, build and run.
Reference
Here are the reference links:
| Number | Link |
|---|---|
| 1. | Download Example |
| 2. | Follow code author |
Conclusion
Text to speech and speech to text are two important features in modern android applications. With TTS, we can enable our application to read out the text to the user, while STT allows the user to speak and convert their speech into text. In this article, we learned how to implement TTS and STT in android using Kotlin. We also provided sample code to help you get started.